Editing
On the last page, you ran scripts in a readme file provided by us. Where Runme really starts to shine, though, is when you use it as an editor!
Setup
Start by initializing a new project and adding a new README.md file. When you open it, you should get an empty canvas, like so:
![]()
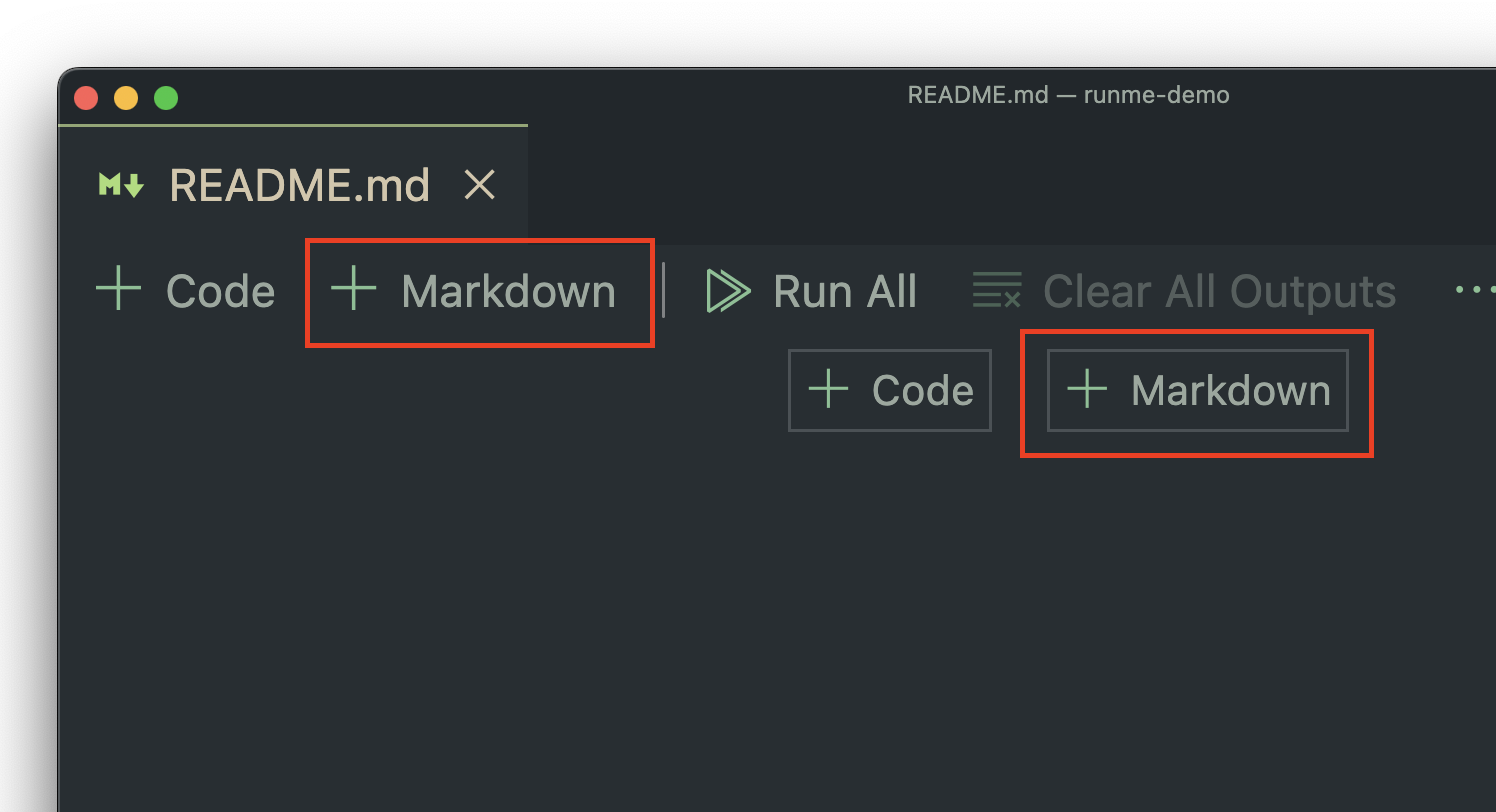
Adding Markdown
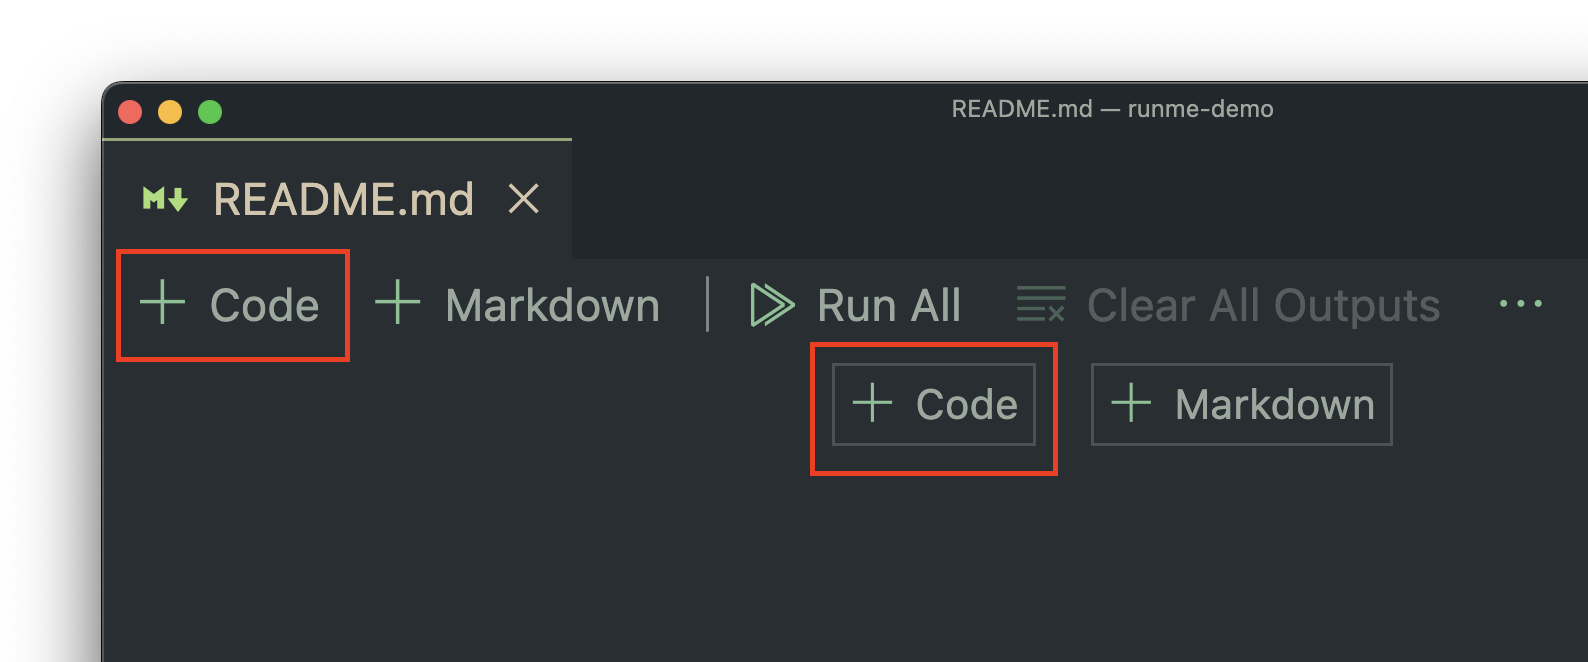
To add a new Markdown section, click the "+ Markdown" button in the top left or center:
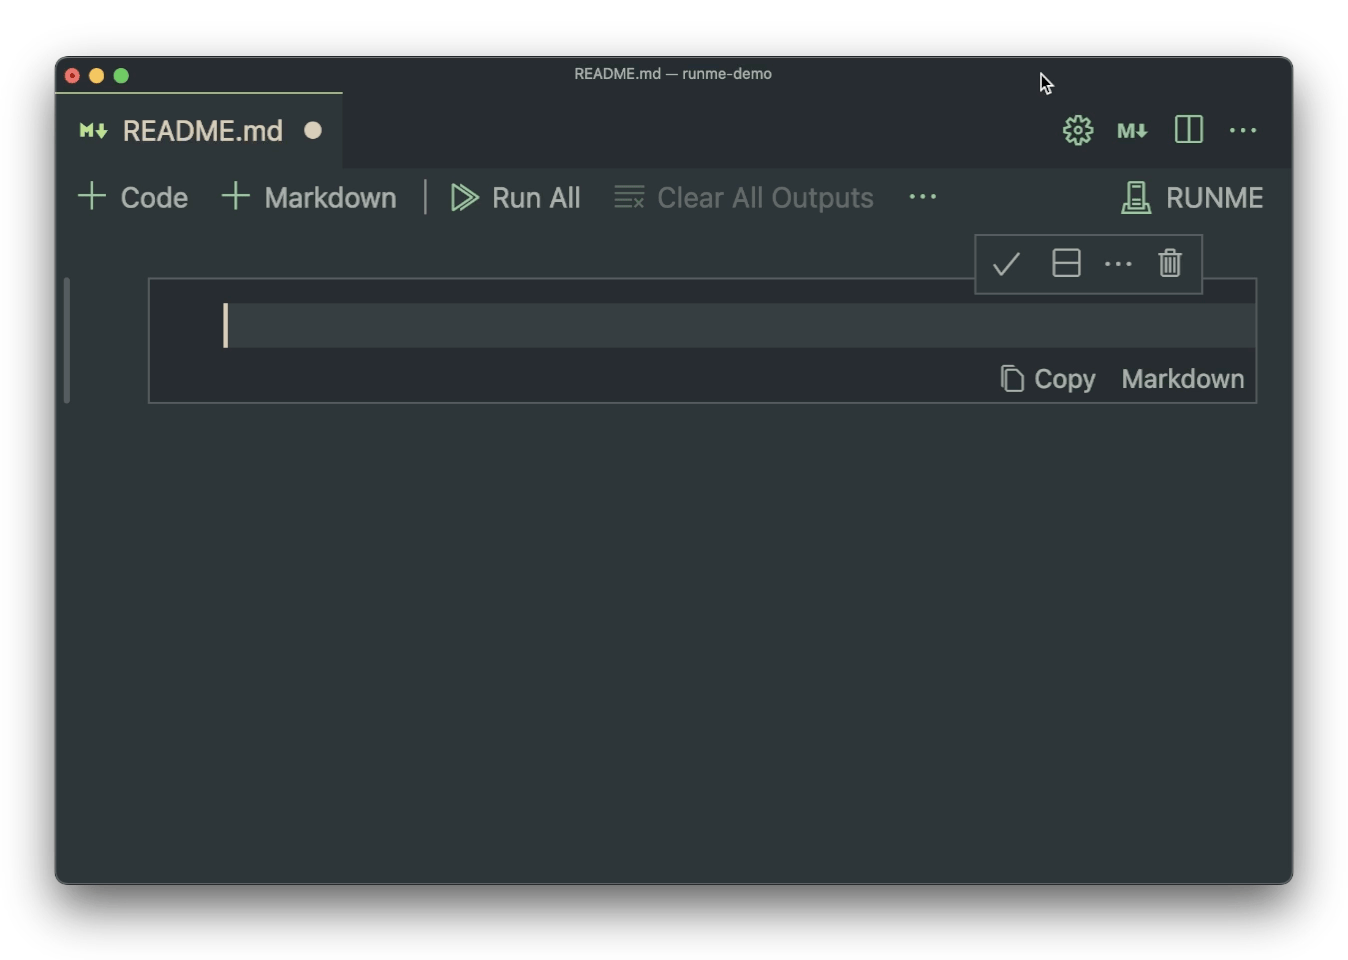
You can then edit the markdown block directly:
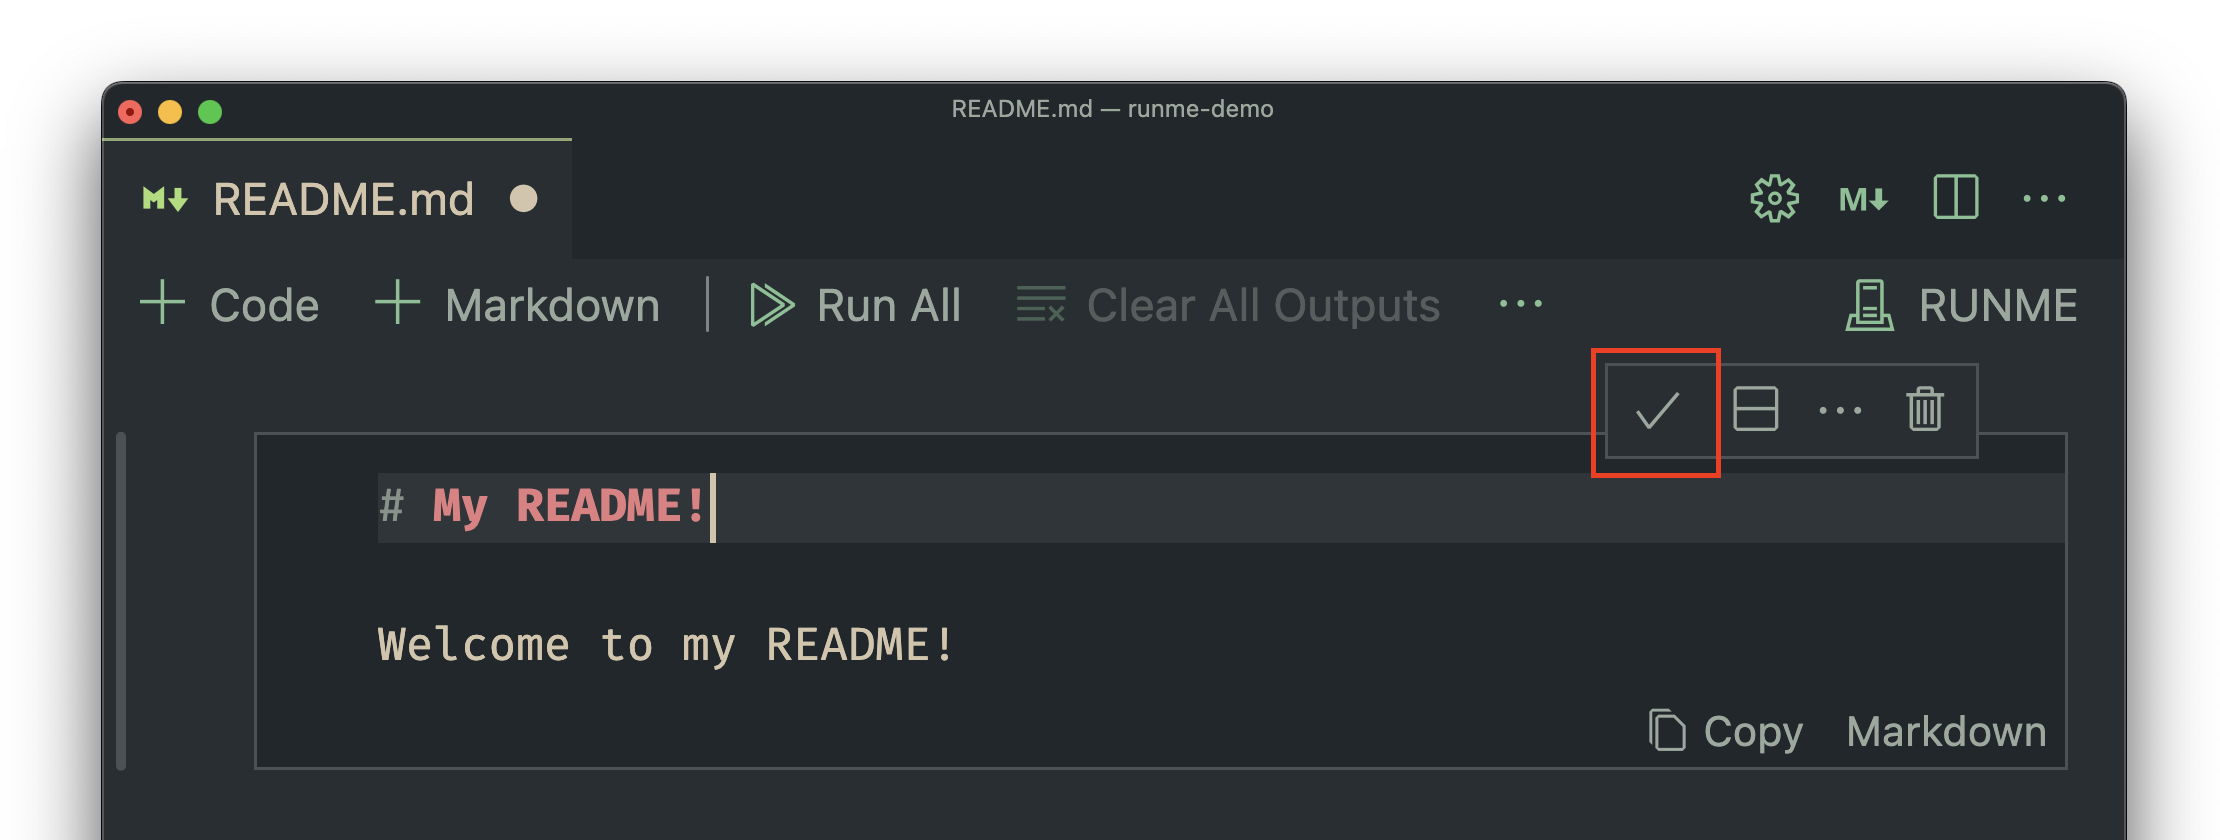
As shown in the video, once you're done editing a block, use the "Stop Editing Cell" button (the one with the checkmark):
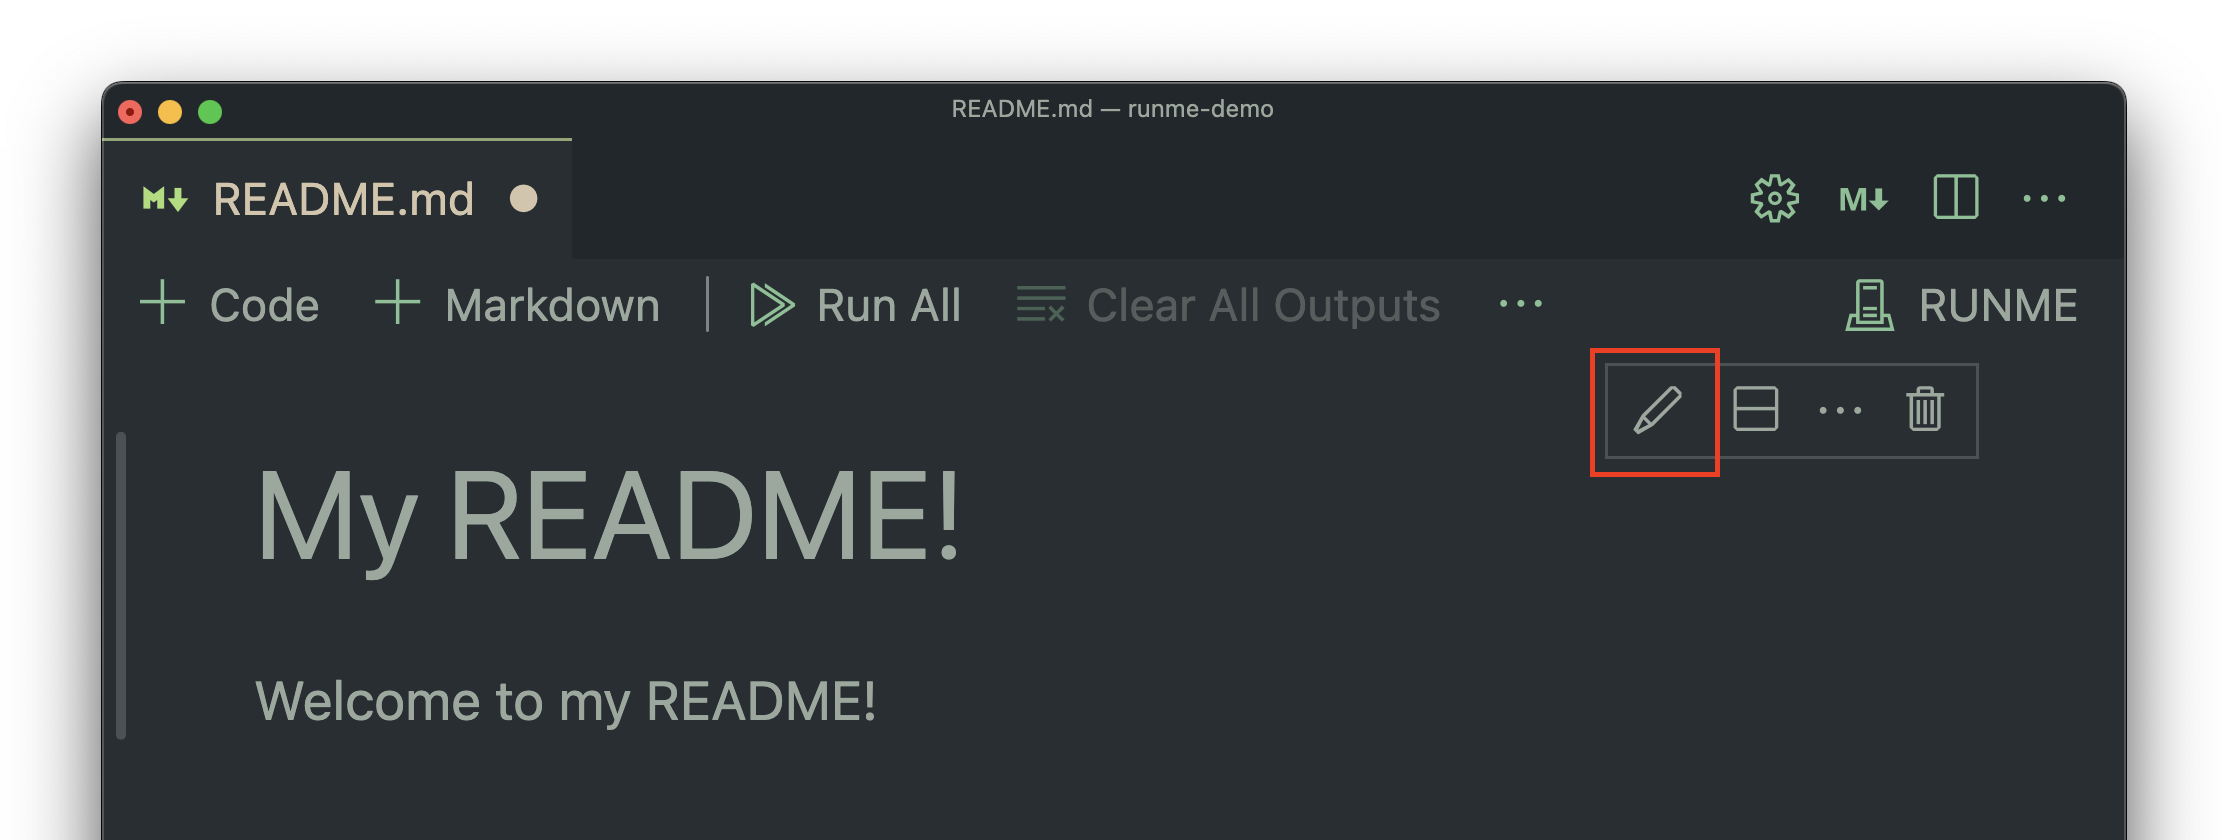
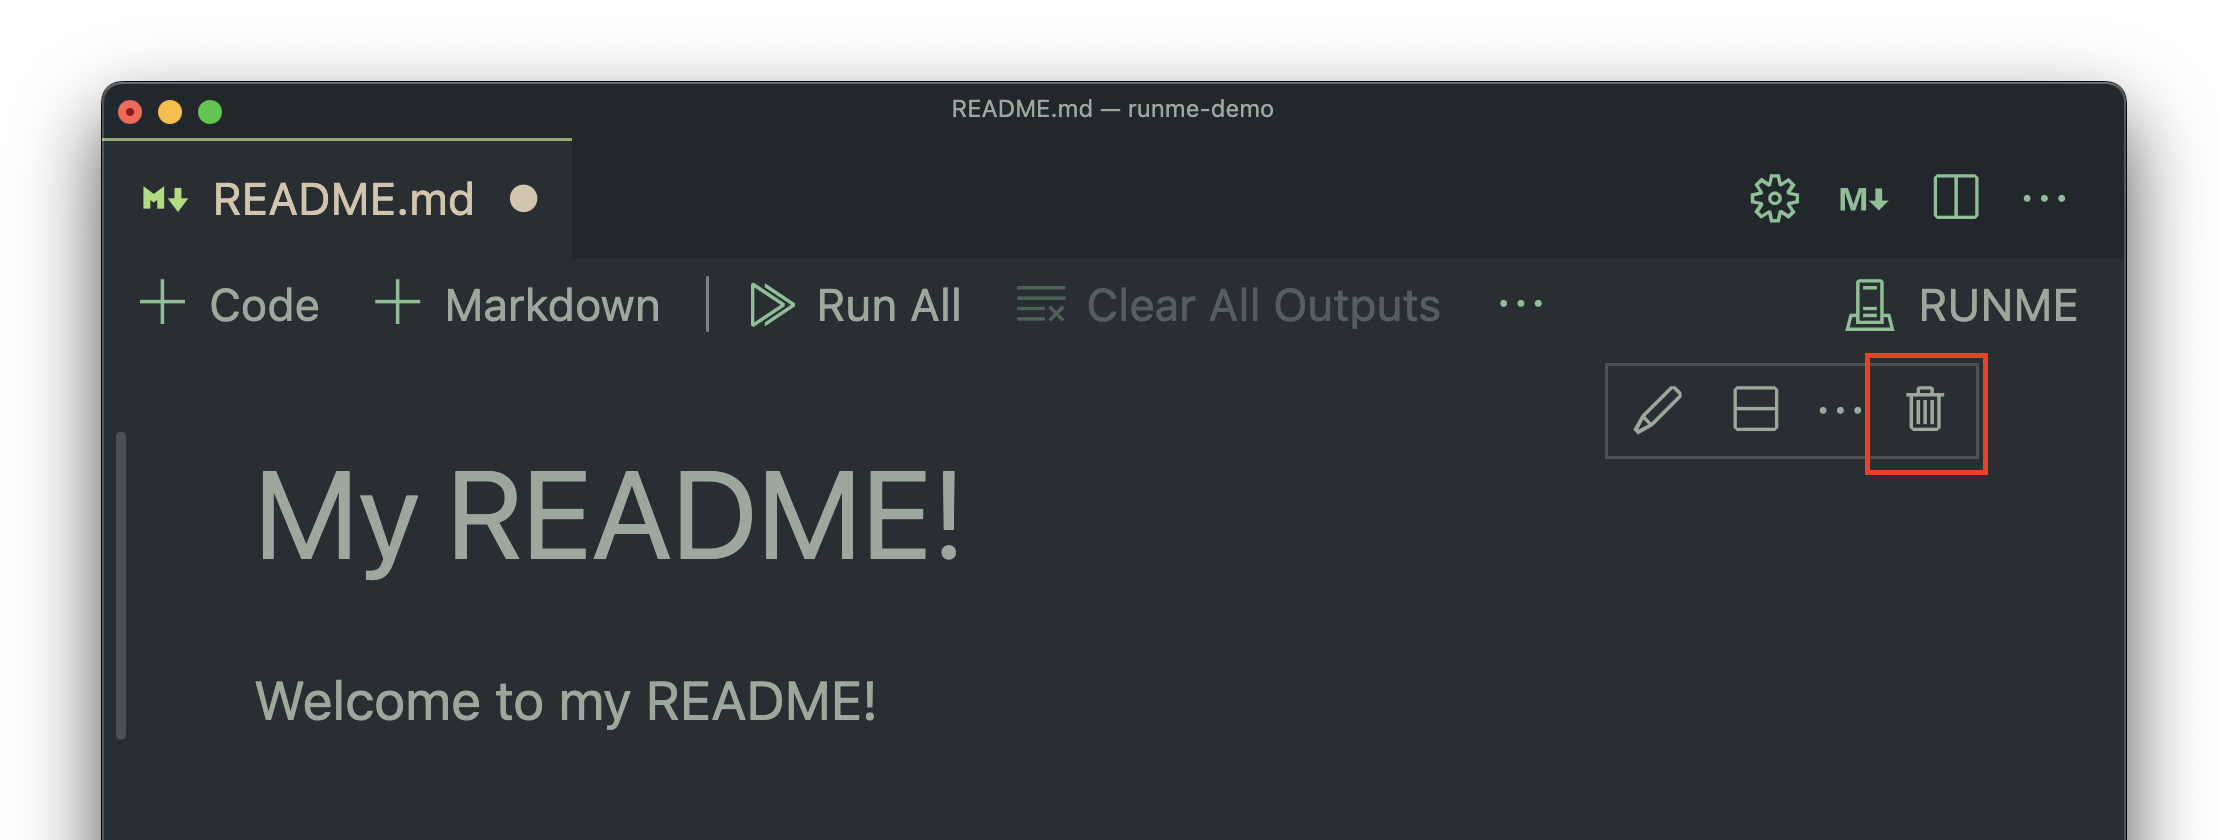
If you ever want to edit the cell again, use the "Edit Cell" button:
Finally, you can remove a cell at any time using the "Remove Cell" button:
Note that the usual shortcuts (like Ctrl + Z) work perfectly in this environment too!
Sidenote
You can use Escape or Ctrl + Enter to quickly finish editing a cell.
You can use Enter on its own to start editing a selected cell.
You can also use Command + Delete to quickly remove a cell!
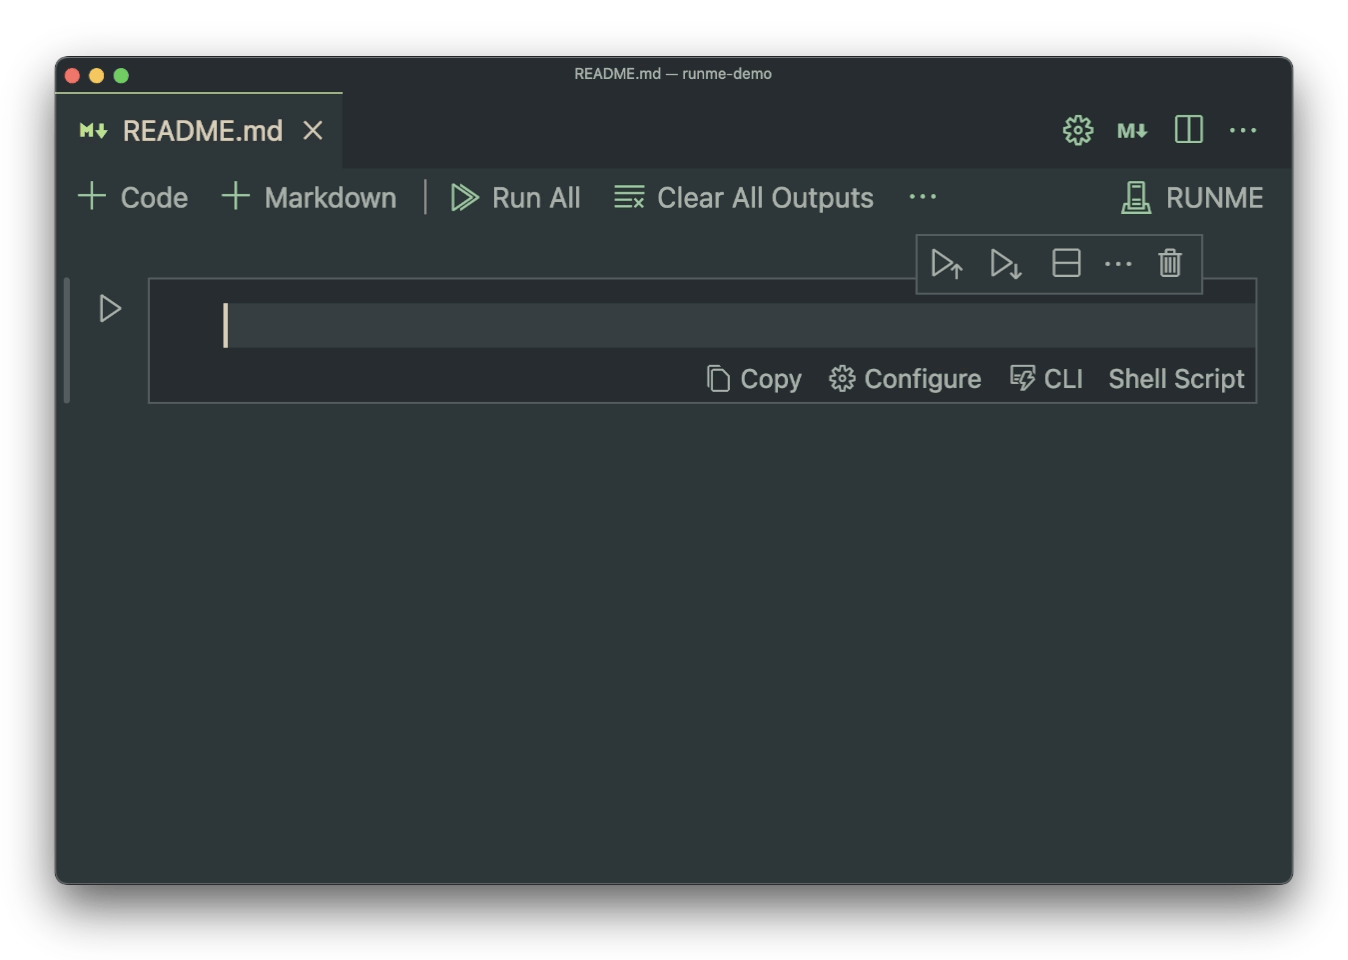
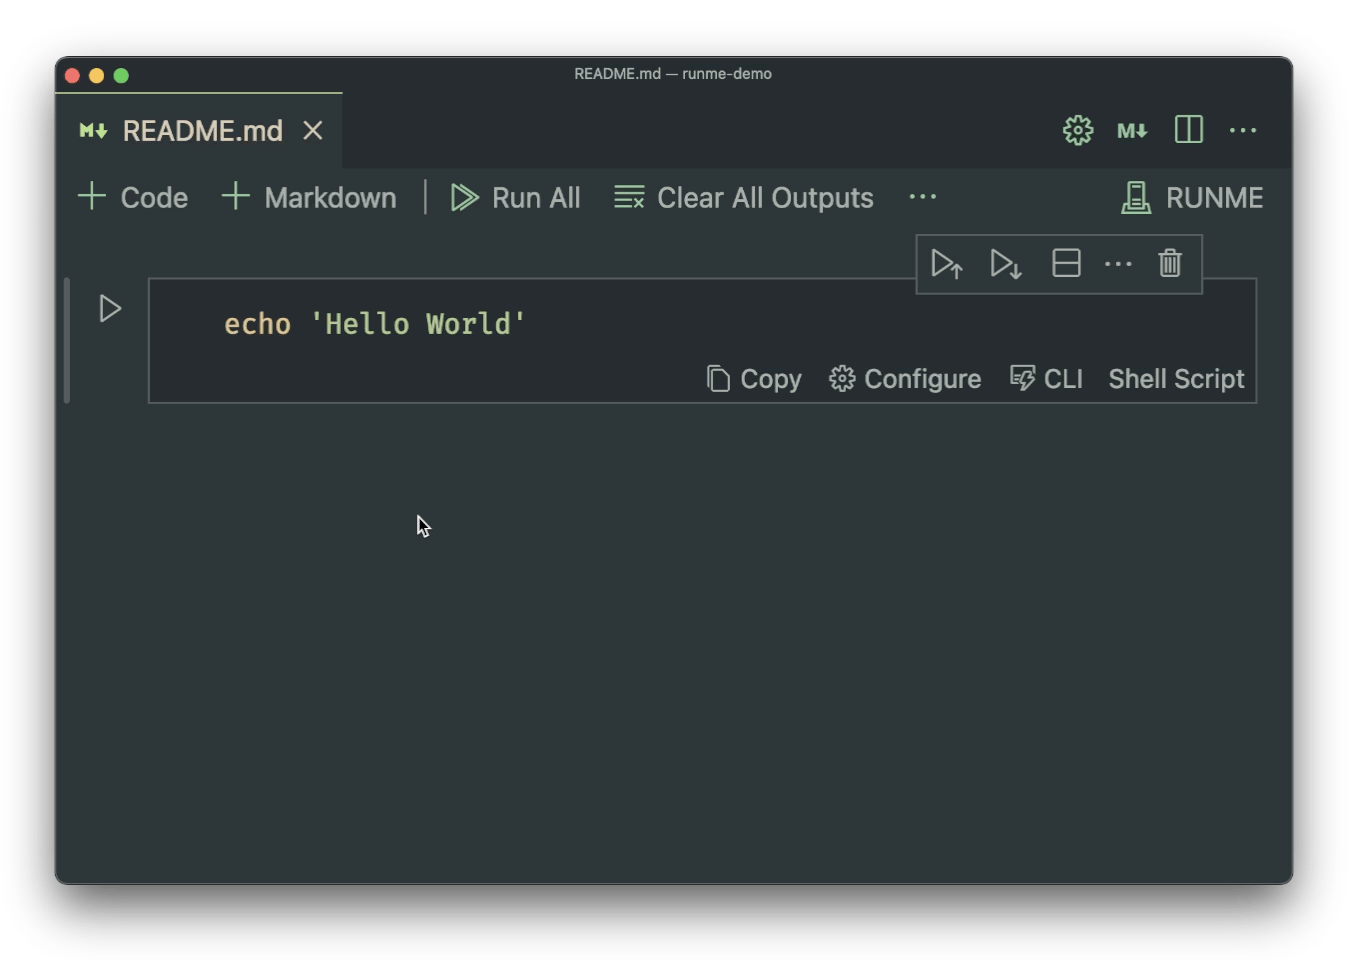
Adding Code
Code cell blocks work similar to Markdown blocks, and can be edited/saved/deleted in the same way.
To create a new code block, use the "+ Code" button in the top left or center:
You can then freely add runnable code:
Interactive Mode
By default, our script will run in "Interactive Mode." This will run the script in a separate terminal window, rather than in the notebook itself.
This is great for, as the name implies, interactive scripts. Our script, however, just prints output, and has no interactivity whatsoever. It would be great to see the output in the terminal!
If we just try to run this as-is, we will experience the following:
To fix this easily, we'll need to access the Configure foldout by clicking on the Configure button:
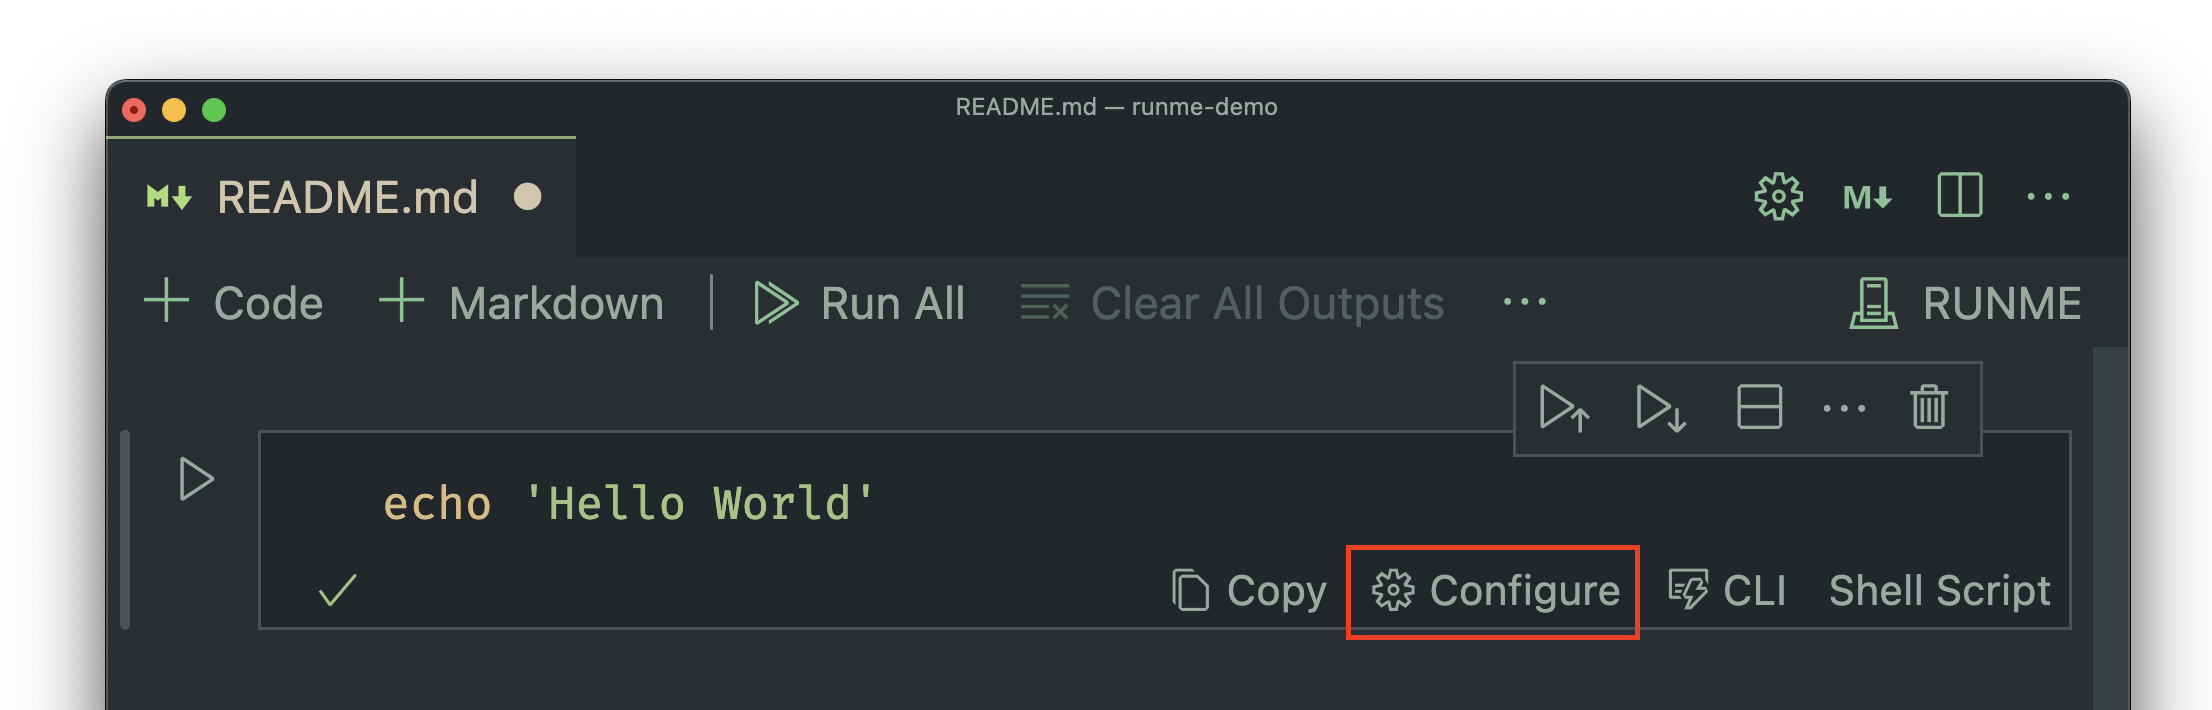
From here, we can easily disable interactive mode:
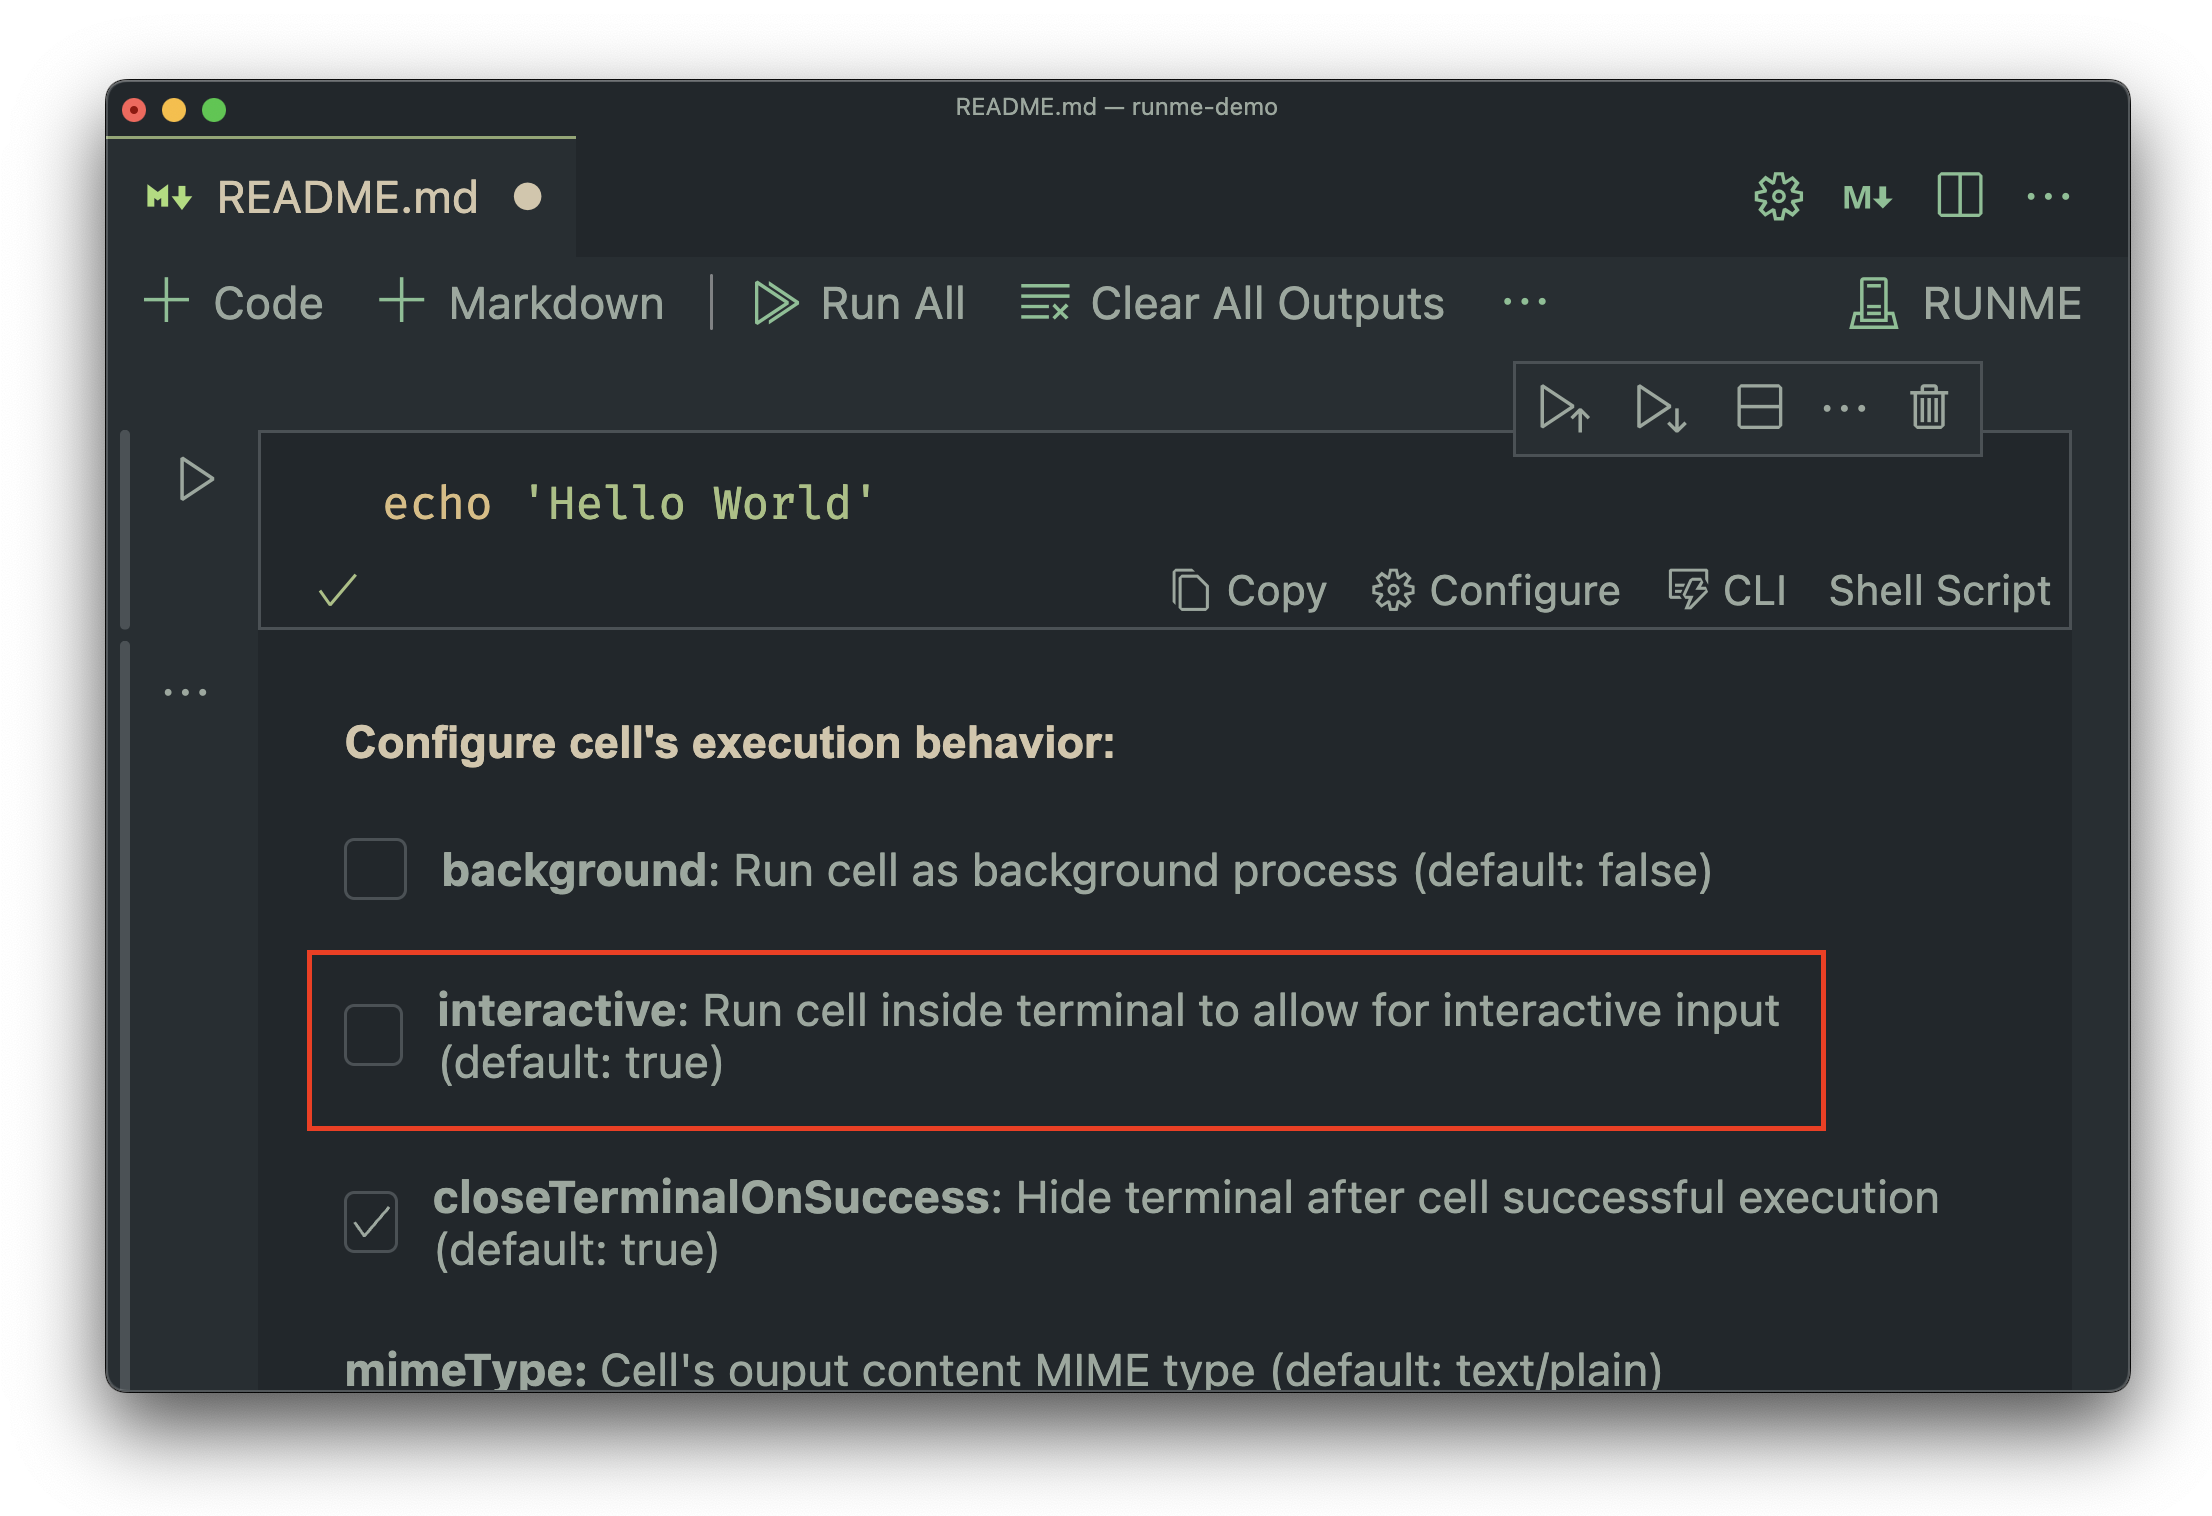
And our code block will now display its output exactly as in the previous guide:
Sidenote
So what if you want to have both interactivity and stay within the notebook?
Unfortunately, making this work with VSCode is a challenge. We're working hard, however, to look for a good solution to this problem!
(TODO: maybe link to upstream VSCode issue here?)
Background Processes
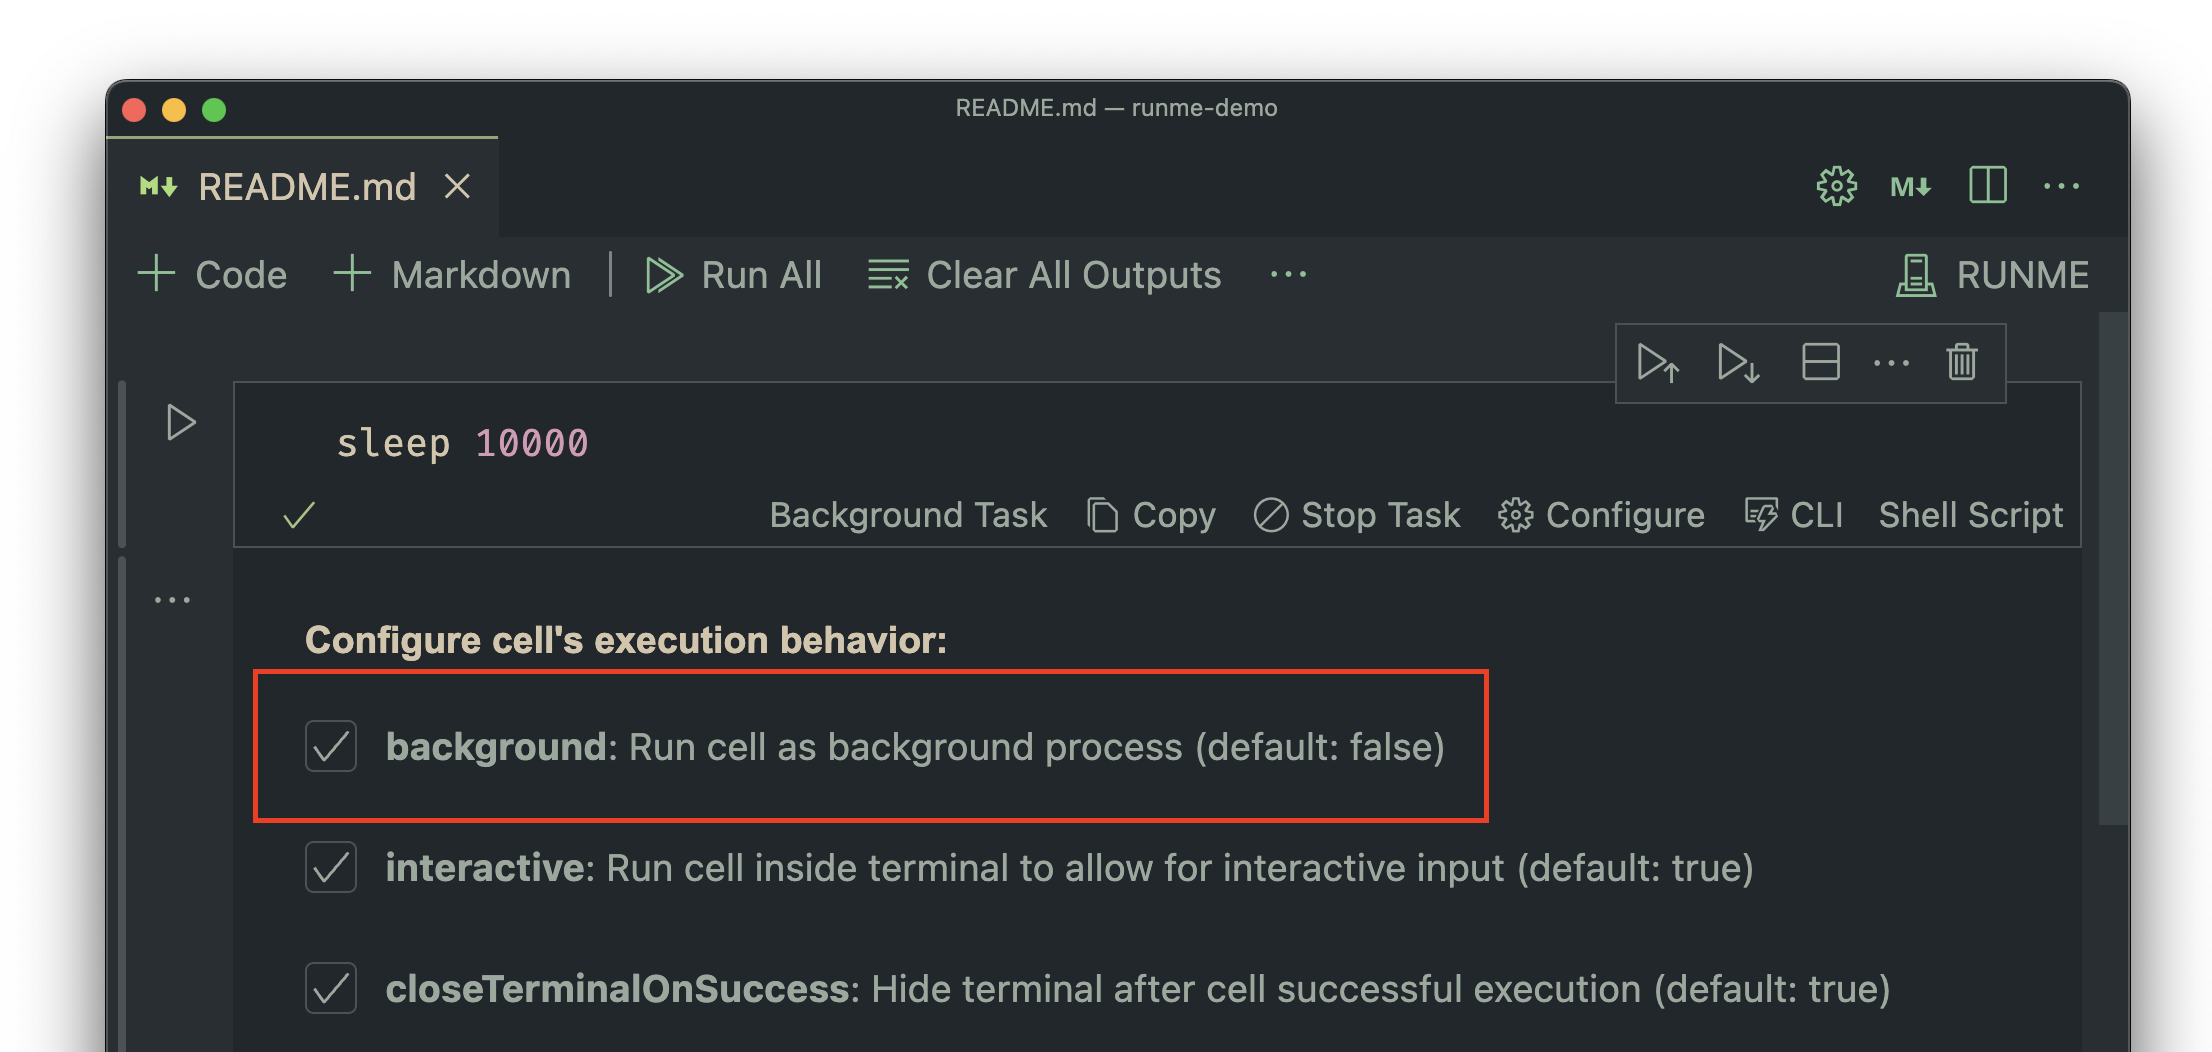
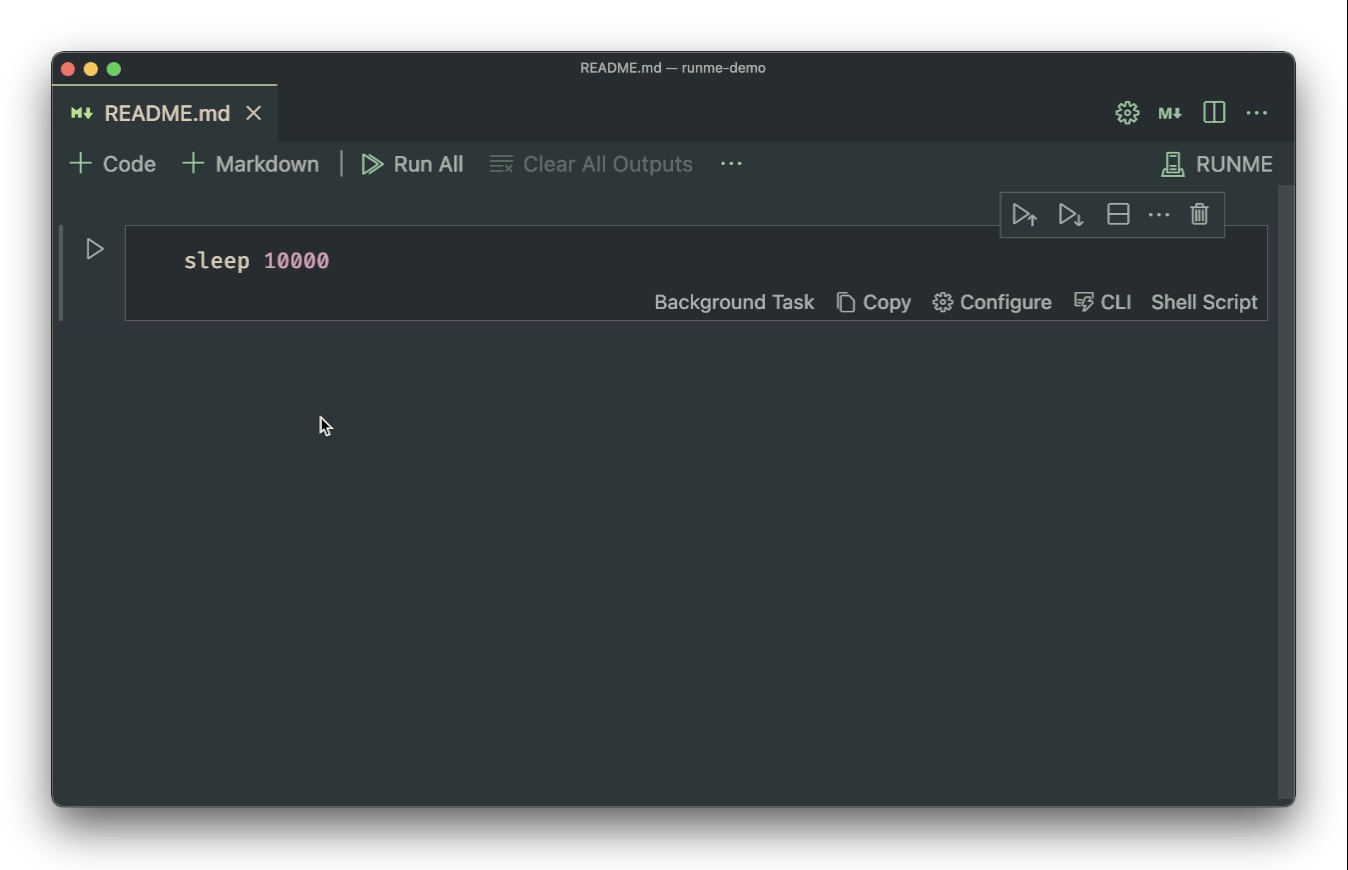
Suppose that you have a script that intends to run in the background (like a dev watcher). To simulate this now, we'll use the script sleep 10000.
You could run this like other scripts, however, Runme supports a special "Background" mode for these kinds of tasks. This mode gives special tools to help manage them!
You can enable Background mode in the same foldout you configured Interactive mode:
Warning!
Background mode only works in tandem with Interactive mode!
Now, when you run the script, it will be part of a long-running terminal session:
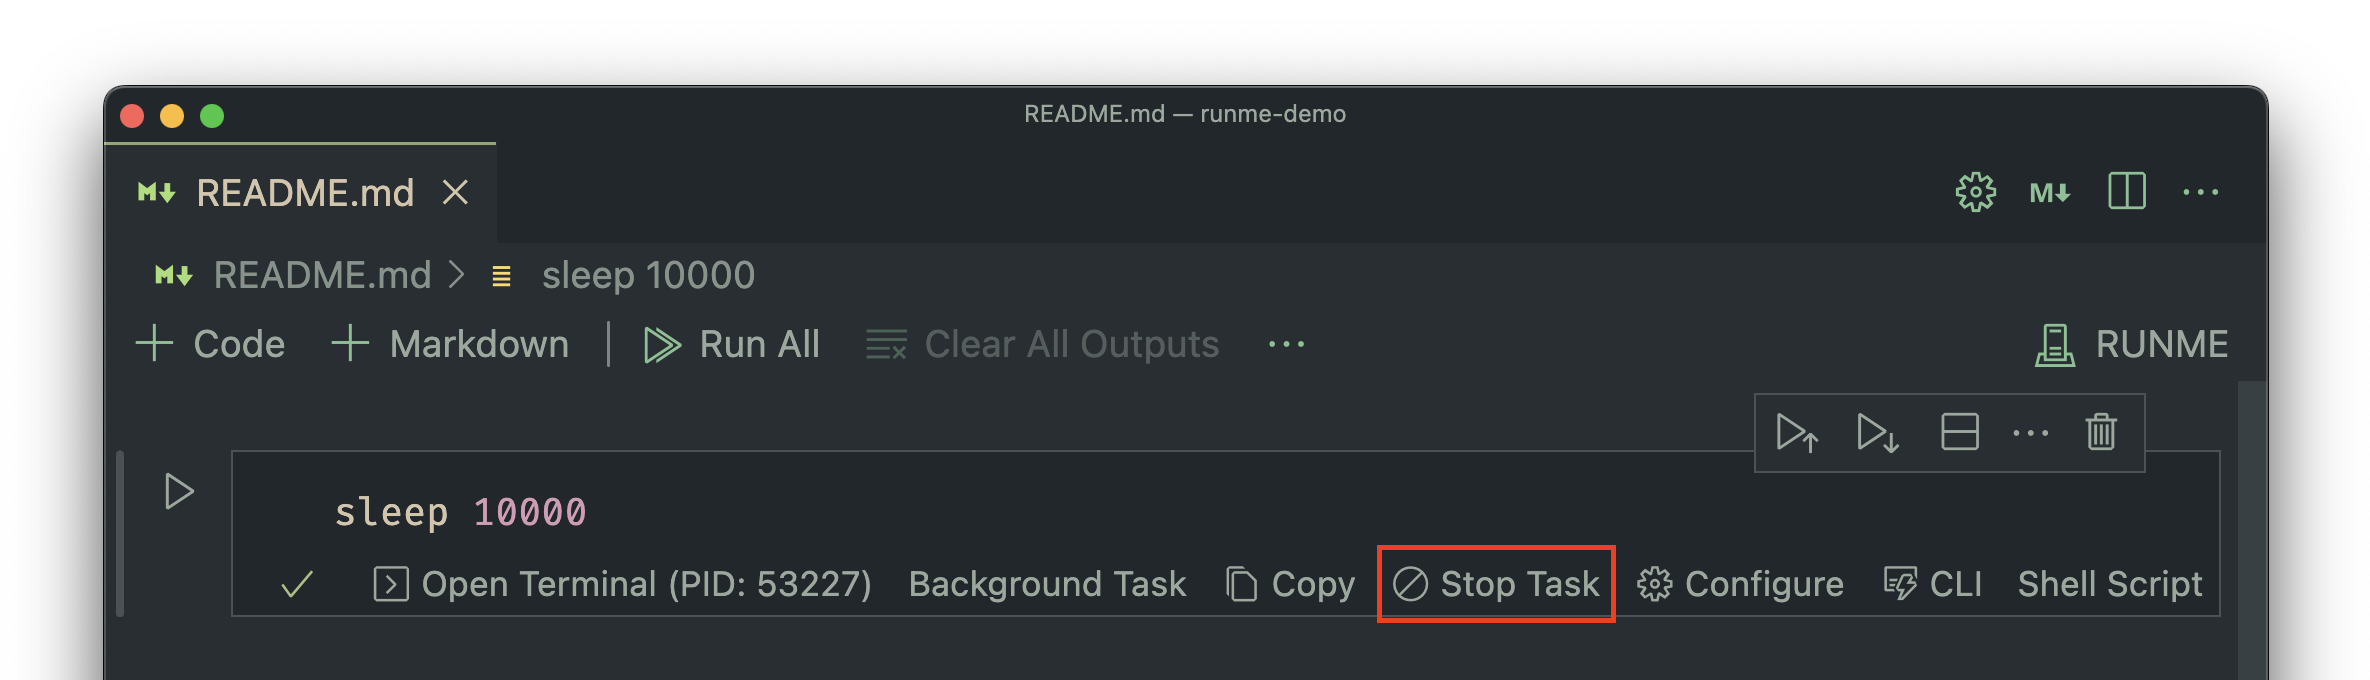
As is demonstrated by the previous video, background tasks are delineated by the "Background Task" label:

Background Tasks also get a "Stop Task" button to end their execution long after starting:
Sidenote
Configuration fields like "background" and "interactive" are set using markdown's script metadata feature:
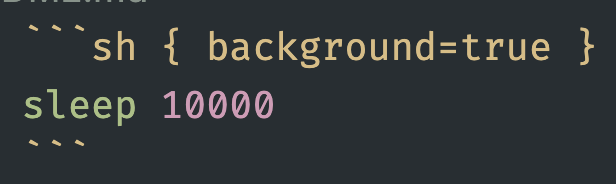
Be sure not to strip this data if you want to use it!
Changing Language
(TODO: show how to change language; need issues fixed for this since language selection is broken at the moment)
Summary
Hopefully, you now feel comfortable making your own notebooks!
In the next guide, you'll see some more practical examples, so you can get some ideas on how to use these tools in action.